
Back when we had a "real" house in Indiana, the guys at my local neighborhood hardware store once called me a "project-lovin' woman," because I was in there so often buying supplies for whatever I was working on at the moment. Just to prove that you can teach a 61-year-old woman new tricks, I decided to try to tile our coach house backsplash. This was the last remaining "finish" item on our to-do list in the coach house.
This blog may not be of much interest except to friends and family, namely those who know the saga of the Italian tiles. For those of you who couldn't care less, go ahead and scroll to the bottom to see a cute photo of Charlie the cat watching the pet sitter video on tv. For those of you with way too much time, continue on....

At the time, we were in the process of remodeling our kitchen. We purchased a series of hand-crafted Italian tiles and had them shipped to Indiana to be incorporated into our backsplash. I held back three of the tiles "just in case" we ever sold that house. Here's how the tiles looked in our kitchen remodel:
Italian Tiles
If you should want to see the entire finished kitchen, here's a link to the other photos: Finished Kitchen 2005. Those of you who have seen our little coach house will recognize a few items, like the black Silgranite sink, faux copper ceiling, open dish cabinet, kitchen table and chairs, wine rack, and now, my three remaining Italian tiles. I still have my "dream kitchen," except now it's very, very tiny! Isn't it Murphy's law that as soon as you get your house just the way you want it, you decide to sell it and move on? That's just what we did; we have been fulltiming now since December of 2008, so only enjoyed that new kitchen for a couple of years.

I'll just describe the process I used in photo captions:
 |
| Simple Mat Cut and Applied to Wall You simply peel the "wall side" paper off and stick it where you want the tile. |
 | ||||||||||
| The first tile sheet applied 1/8" above counter When ready to stick the tiles, you remove the "tile side" plastic off the Simple Mat and position the tiles. You have to be careful, because once they're on, it's very hard to reposition them.
Let's just say it's a good thing I married a smart man. I'm mathematically challenged, and would have goofed this step for sure!


|


 |
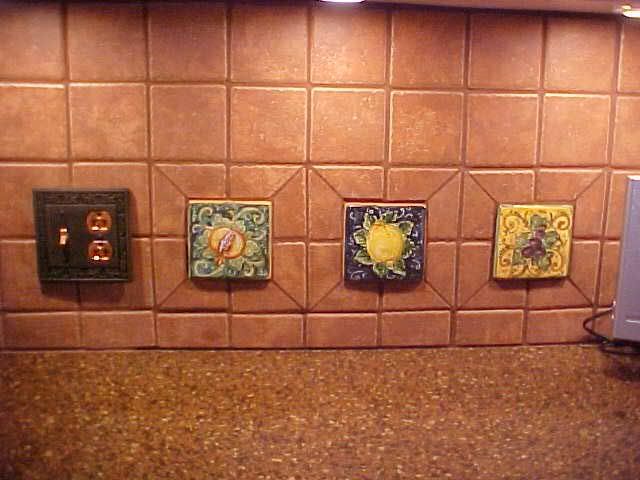
| Caulked and Polished! The hardest part for me was wiping the grout haze from the little tile faces. Just wiping with a dry cloth didn't work, so I had to wait and use tile cleaner after 24 hours. I spent a whole afternoon polishing each little tile until it was the way I wanted it. The mosaic glass tiles are "Midnight Blue" and have shiny copper, black, and white accents throughout the glass. I found a perfect light switch plate to match the copper, but had to order the matching outlet cover. I also had to readjust the switches underneath and use longer screws on the switch box to make it flush with the new tile.  Now all I have to do is await my outlet cover and it will be totally finished!  One final touch: While we were exploring Tuscany on a rainy day, we happened upon a beautiful monastery which allowed tourists.  We could hear the monks singing as we explored the grounds.  In the gift shop, I purchased a small hand-crafted tile as a memento. It had a lovely cypress tree hand painted on it; it just seemed to symbolize our entire trip, for we saw those lovely trees everywhere in Tuscany. The little tile is an odd shape and not perfectly symmetrical, so it could not be incorporated into a wall. It now has a home (hung by fishing line) behind my sink. All of our things just seem to look better and fit better in our coach house.  |


4 comments:
Way to go Diane!! The tile looks fantastic. Now you will be reminded of your wonderful trip each time you see them:o))
You are such a cleaver girl;o))
Happy Thanksgiving!!
I LOVE the backsplash, you both did a WONDERFUL job! Can't wait until 2012 when we are there for you to give us some decorating hints!!
It looks beautiful and it's so personalized with those tiles from your travels.
I've never heard of a pet setting video but it's a nice idea.
Syl
What a beautiful job! You sure have made your Coach House your "home". Great way to have those Italy memories close by.
I am going to Google pet sitting video.
Post a Comment